Chapati is the Indian’s everyday bread. It is a paste without yeast, without baking powder, made only from flour, fat, water, and salt. Chapati is simple to make and delicious to taste. In this recipe, I will show you How To Make Roti Bread (chapati)
The components will differ according to the region. In our case, the oil will be the fat required to make it. The original recipe calls for ghee, a butter-derived product.
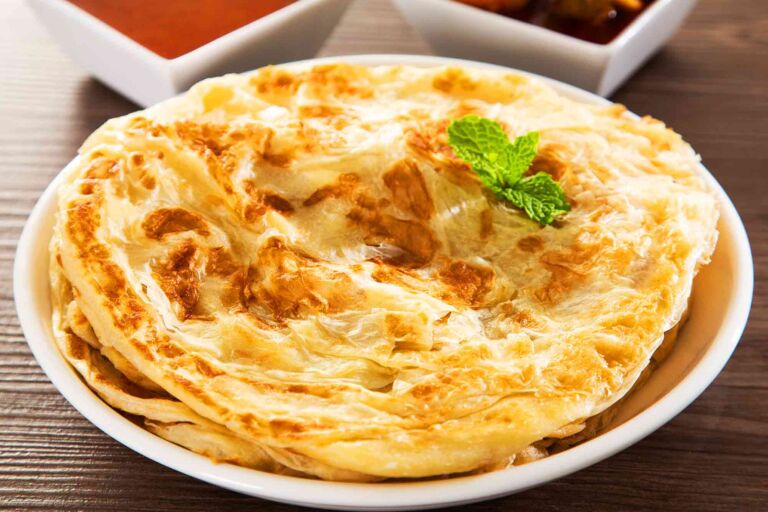
How To Make Roti Bread (chapati)
| Prep time | Cook Time | Rest Time | Total Time |
|---|---|---|---|
| 10 min | 15 min | 20 min | 45 min |
A Little History About How To Make Roti Bread (chapati)
Chapat, which meaning “slap” or “flat,” refers to the conventional technique of rolling thin dough into rounds and slapping them between damp palms of hands. The circle of dough is turned with each slap. In the Guru Granth Sahib from the 15th century, roti is referred to as chapati. Baba Farid ji wrote the shabad “Roti meri kath ki, lahvan meri bhukh” in the 12th century.
Ain-i-Akbari, written in the 16th century by Abu’l-Fazl ibn Mubarak, the vizier of the Mughal Emperor Akbar, mentions chapati, as How To Make Roti Bread (chapati).
Some believe that chapati originated in the 5000-year-old Egyptian Indus Valley civilization. Others assert that it originated in East Africa and was taken to India.
One of the most popular varieties of wheat bread, known as a staple diet on the Indian subcontinent, is chapati. There are many options of How To Make Roti Bread (chapati), today we choose this recipe.
One of the ancient growing regions for wheat is said to be the Indus Valley.
Ingredients
Instructions
-
How To Make Roti Bread (chapati) Dough
Put the atta flour in a large bowl.
-
Start by gradually adding water. Bring the dough together by combining it with your hands as you add water. Here, I required around 195 ml of water. The type of flour you choose will determine how much water you require.
-
Start kneading the dough after it comes together. Apply pressure by kneading with your finger’s knuckles.
-
Using your palms, knead the dough once more while exerting pressure with your knuckles.
-
Continue kneading the dough until it seems soft and malleable. Add a little water and knead it again if it seems hard or firm. Add some dry flour and stir if it seems too soft or sticky.
-
The dough should be smooth when finished. Your fingertips should leave an impression on the dough when you push it.
-
For 20 to 30 minutes, cover the dough with a wet cloth or paper towel.
-
Make the roti
Give the dough a quick knead once more after it has rested.
-
Divide the dough into 12 equal parts.
Start by working with one ball of dough at a time, covering the others with a moist towel to prevent drying out.
-
Take one of the balls and smooth it by pressing between your fingers. Then, to make it smooth and rounded, roll it between your palms . Press the round dough ball to flatten slightly.
-
Now place some atta flour on a plate and use it to sprinkle the roti as you roll it. The formed dough ball must be dusted all over with flour.
-
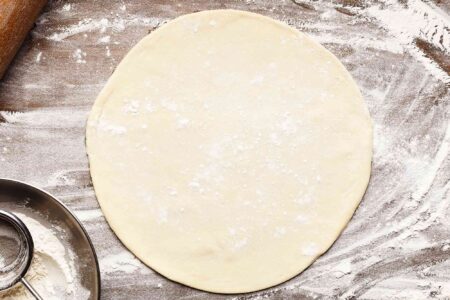
Using a rolling board and rolling pin, begin rolling the roti.
-
Roll the dough lengthwise while gently pressing down with the rolling pin. If you are rolling it properly, the dough will naturally move in a circular direction, resulting in an evenly rolled roti.
-
You may also roll the roti a little, pick it up, move the roti with your hands a little, and roll it again. Make a circular roti with a 12 – 15 cm (5 to 6 inch) diameter by rolling the dough.
-
While rolling the roti, you will need to dip it in dry flour numerous times. Rolling the roti out after dipping it into the atta on both sides will prevent the dough from sticking to the rolling pin.
-
Cook the roti
Set the pan’s heat to medium-high. Before you put the roti on the pan, make sure it is hot enough.
-
Shake off the extra flour from the roti, and place it on the heated pan.
-
Until you notice bubbles on the top side, heat it for 15 to 30 seconds. Turn the roti at this stage to avoid overcooking.
-
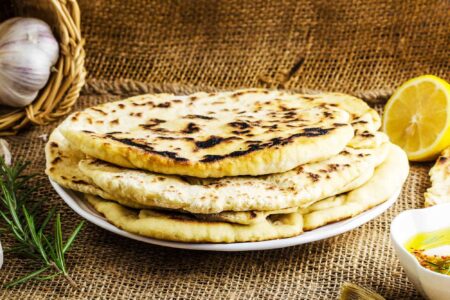
Allow the other side to cook for about 30 seconds. When there are brown spots all over, your roti has finished cooking.
-
Immediately spread ghee on the cooked rotis. Serve while is warm.
Enjoy, Good Appetite!